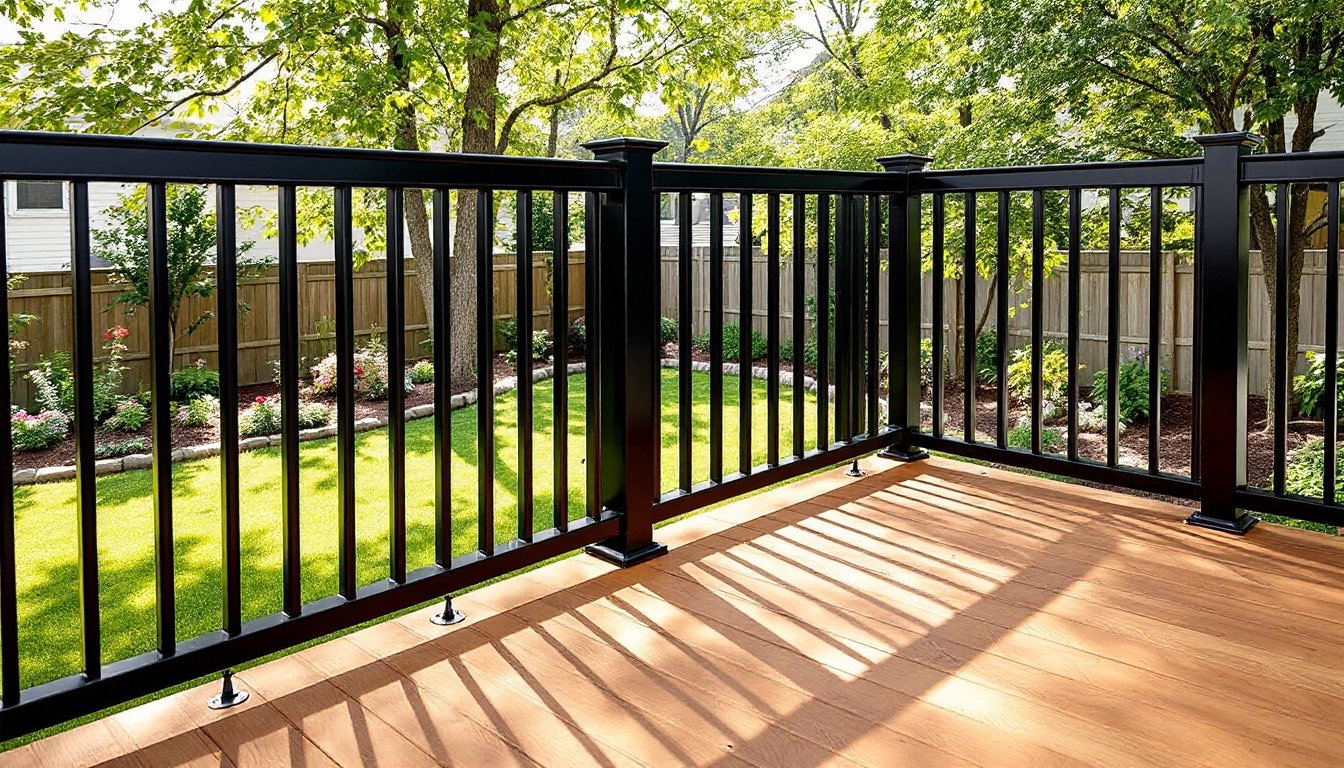
A black deck railing transforms the entire personality of a backyard. It’s sleek, modern, and visually grounding, yet practical enough to handle sun, rain, and seasons of wear. Whether you’re building a new deck from scratch or upgrading an existing one, black railings work with nearly any home style, from contemporary farmhouses to minimalist suburban lots. They also happen to meet safety codes without screaming “safety railing,” which any homeowner who cares about curb appeal appreciates. This guide walks through why black railings make sense, what materials work best, how to install them yourself, and design ideas that’ll make your deck the neighborhood standout.
Table of Contents
ToggleKey Takeaways
- Black deck railings offer a modern, versatile aesthetic that complements any home style while meeting safety codes without compromising curb appeal.
- Aluminum and powder-coated steel railings provide superior durability with minimal maintenance, requiring only occasional washing compared to painted wood alternatives that need repainting every 3–5 years.
- DIY installation of black aluminum railing systems is feasible and can save $800–$1,200 in labor costs on a typical 40-foot deck when you follow manufacturer templates and ensure posts are solidly anchored.
- Building codes require balusters spaced no more than 4 inches apart and railings 36–42 inches high; professional inspection is recommended if you’re uncertain about post strength or structural loads.
- Material costs range from $1,000 for painted wood to $4,800+ for glass panel railings on a 40-foot deck, with aluminum and composite options offering the best balance of affordability, aesthetics, and low maintenance.
Why Choose Black Deck Railings
Aesthetic Appeal and Modern Design
Black railings are a modern design anchor. They ground your deck visually and create clean sightlines that let landscaping and views steal the show instead of fighting them. Unlike wood stain variations or bright metals, black is unambiguous, it reads as intentional, finished, and curated. A black railing against natural cedar or composite decking creates contrast that photographs well and ages gracefully. It also pairs effortlessly with stone, metal hardware, and contemporary furniture without clashing.
The versatility is real. Black railings work on a farmhouse porch, a minimalist modern deck, or a traditional colonial home. They don’t demand a specific aesthetic: they enhance whatever exists. This is why interior designers and architects default to black for outdoor spaces when they want something that won’t date or feel trendy in five years.
Durability and Low Maintenance
Black aluminum and powder-coated steel railings are built to outlast the deck itself in most cases. Aluminum doesn’t rust, won’t rot, and requires only occasional washing with soapy water to stay sharp. Powder coating, a baked-on finish that bonds to the metal, resists UV fading far better than paint. It won’t chalk, crack, or require yearly touching up the way traditional paint does. Vinyl and composite black railings share similar longevity: no staining, no sealing, no annual maintenance beyond a rinse.
Wood railings painted black require the most upkeep. They’ll need repainting every 3–5 years depending on climate, and prep work (sanding, priming) makes the job tedious. If you want the warmth of wood but the low-maintenance appeal of black, composite black railings split the difference, they feel more organic than aluminum but demand far less work than painted wood. For busy homeowners, that difference matters.
Material Options for Black Deck Railings
Your material choice shapes installation difficulty, lifespan, and maintenance burden. Black aluminum railing systems are the DIY-friendliest option. They’re lighter, don’t require fastening to wood, and systems like Infinity or TimberTech’s black aluminum rail kits snap together with self-tapping fasteners. Sections are usually 6 feet long and mount to posts with minimal fuss. Expect to spend $40–$70 per linear foot installed.
Powder-coated steel is heavier but equally durable and slightly cheaper ($30–$50 per linear foot). Steel railings require proper lag bolts and concrete anchors if ground-level. This isn’t harder than aluminum, but the weight demands a helper and careful measurement.
Composite black railings (fiberglass-reinforced nylon or PVC) bridge wood and metal aesthetics. They’re rigid enough for deck-height use, won’t rot or splinter, and resist UV fade better than painted wood. Cost runs $50–$80 per linear foot. Installation mirrors wood railings: they bolt to posts with standard fasteners. Brands like Azek and Trex offer black composite systems with integrated balusters (the vertical spindles).
Painted wood railings demand the most labor. Pressure-treated 2×4 lumber ($1–$3 per board) gets assembled, primed with exterior wood primer, and top-coated with exterior black paint. Prep, painting, and maintenance make this the budget option upfront but the money-pit option long-term. Reserve this for covered decks where UV and moisture exposure is limited.
Building codes typically require balusters spaced no more than 4 inches apart (the “sphere rule”, a 4-inch sphere can’t pass through). Check your local International Residential Code (IRC) for height requirements: most jurisdictions mandate 36–42 inches from deck surface to railing top. Post spacing usually maxes out at 6 feet on center, though some systems allow 8 feet.
Installation Tips for DIY Success
Pre-Installation and Planning
Measure twice, buy once. Sketch your deck’s perimeter, note all post locations (they’re your anchor points), and calculate linear feet of railings needed. Black railing sections come in standard lengths, usually 6 feet, so plan around multiples. Order 10% extra fasteners: screws get lost, and you’ll use spares for adjustments.
Inspect posts before securing railings. Posts must be solidly anchored: bolted to footings below frost line, or lag-bolted to deck rim board. Wobbly posts doom even the best railings. If a post shifts, your railing won’t perform safely under code loads (typically 200 pounds of horizontal force applied anywhere on the railing). Tighten all post connections before starting.
Step-by-Step Installation (Aluminum or Composite Systems)
-
Locate and mark fastener holes on your deck’s rim board or posts. Most railing kits include a template: use it. Measure from the deck surface to ensure consistent height.
-
Drill pilot holes with a 3/32-inch drill bit to prevent wood splitting (for composite or wood mounting). For metal-to-metal (steel or aluminum), use a 1/8-inch bit.
-
Secure bracket hardware with supplied fasteners. For aluminum, self-tapping #14 hex-head fasteners are standard. Don’t over-tighten: snug them firm, then stop. Over-tightening strips threads and cracks plastic bushings.
-
Assemble railing sections according to the manufacturer’s template. Balusters usually slide into top and bottom rails: the system holds them in place. Check alignment before fully fastening.
-
Test the railing by pushing firmly at the top with your hand. It should not move. If it gives, re-check all fasteners.
Safety Gear and Precautions
Wear safety glasses when drilling. If cutting aluminum or composite balusters, use a miter saw with a metal-cutting blade and wear hearing protection and a dust mask. Work at a comfortable height using proper scaffolding or a helper to hold sections while fastening. Don’t rely on gravity or one hand to hold a railing section, it’ll shift, fasteners won’t align, and you’ll waste time troubleshooting.
Building codes exist because railings prevent falls. Take the installation seriously. If your deck is higher than 30 inches above ground, a railing isn’t optional, it’s a legal requirement. If you’re unsure about post strength or railing loads, hire a professional deck contractor to inspect the frame before adding railings.
Painting or Finishing (If Needed)
Most black aluminum and composite systems arrive factory-finished, so no painting is required. If you choose painted wood or must touch up scratches, use exterior-grade acrylic latex paint rated for wood. Prime bare wood with exterior primer first. Two coats of paint, sanded smooth between coats, will last 3–5 years in a temperate climate or 2–3 years in harsh sun or salt spray (coastal regions).
Black Railing Design Ideas and Styles
Black railings are a blank canvas. Pairing them with complementary materials amplifies their impact without overcomplicating the design.
Mixed-material railings combine black metal with wood top rails, stone, or cable accents. A black aluminum post and baluster system with a stained wood handrail (cedar or composite) warms the look while keeping the sleekness of the balusters. Coastal designs often swap traditional balusters for horizontal stainless steel cables threaded through black posts, unobstructed views, contemporary vibe, and codes-compliant if spacing stays under 4 inches.
Horizontal board railings use wide composite or pressure-treated boards stacked horizontally and painted or stained black. This style echoes modern architecture and hides balusters entirely. It requires careful measurement to keep boards level and consistent spacing, but the payoff is a seamless, minimalist look.
Glass panel railings with black aluminum or steel frames offer an industrial-contemporary style. Tempered glass panels (required by code for safety) mount into aluminum frames, creating an open feeling without sacrificing sightlines. Cost runs higher ($80–$150 per linear foot), and installation requires precision, but the visual payoff rivals high-end resort decks.
Composite black railings with integrated lighting are trending. LED strips mounted under the handrail or within post caps create subtle ambient light, practical for evening use and adds a premium finish. Brands like Trex Transcend offer these integrated systems, though they cost more upfront.
For design inspiration grounded in real construction, resources like This Old House and Southern Living showcase deck builds with black railings in varied climates and architectural contexts. Fine Homebuilding covers advanced railing techniques, from curved sections to post details, if you’re planning something custom.
The key: avoid mixing too many materials or colors. Black railing + wood deck + one accent material (cable, stone, or composite handrail) = polished. Black railing + wood deck + painted trim + cable + composite handrail + stone + lighting = visual chaos. Restraint wins.
Cost Considerations and Budgeting
Railing costs depend on material, length, and whether you’re replacing an entire system or just upgrading sections. A typical 20-foot deck with two sides (40 linear feet of railing) breaks down like this:
Aluminum systems: 40 feet × $55/foot (mid-range) = $2,200 material + fasteners/hardware ($100–$200). DIY installation saves $800–$1,200 in labor.
Composite railings: 40 feet × $65/foot = $2,600 material + hardware ($150). Also DIY-friendly: labor savings are similar.
Painted wood railings: 40 feet × $25/foot = $1,000 material (lumber, primer, paint). Labor is heavy but free if you DIY. Budget $200–$500 for tools if you don’t own a miter saw and orbital sander.
Glass panel railings: 40 feet × $120/foot = $4,800 material. Tempered glass, precision framing, and complex fastening push installation costs high ($1,500–$2,500). This is rarely a DIY project.
Regional material costs and market fluctuations shift these numbers, so get local quotes. A coastal area with salt-spray exposure may charge premiums for powder-coated finishes. A landlocked temperate region might price aluminum and wood similarly.
Hidden costs: if your existing posts are damaged, out of plumb, or undersized, you’ll need to reinforce or rebuild them before railings go on. A structural post repair can add $200–$800 per post. Check post condition early: it’s cheaper to fix posts than to pull off a badly installed railing later.
Permits vary by jurisdiction. Some areas require a railing permit ($50–$200) if the deck is over 30 inches high or if you’re doing structural work. Check with your local building department before buying materials. A permit might seem like paperwork friction, but it ensures your railing passes inspection, crucial if you ever sell the home or file an insurance claim.