A quality office desk with shelves is becoming the go-to choice for homeowners maximizing compact work spaces. Whether you’re setting up a first home office or upgrading your current setup, combining a desk with integrated shelving eliminates the need for separate furniture and keeps everything within arm’s reach. Unlike standalone desks, a desk with shelf configurations offer storage and workspace in one footprint, making them ideal for small bedrooms, corners, and apartments. This guide walks through choosing, building, and styling the perfect desk with shelving solution for your home.
Table of Contents
ToggleKey Takeaways
- A desk with shelf design maximizes small spaces by combining workspace, storage, and display in one footprint, eliminating the need for multiple furniture pieces.
- Floating shelves (12–18 inches above the desk) offer a clean, modern look and work well for renters, while side-mounted shelving units accept heavier loads by transferring weight directly to the desk frame.
- Choose shelf depth based on storage needs: deeper shelves (10–12 inches) suit paperwork and binders, while shallower shelves (6–8 inches) work better for lighter supplies and visual appeal.
- DIY desk with shelf projects are achievable with basic materials (2×4 lumber, plywood, brackets) and tools, with proper stud anchoring critical for safety and weight capacity.
- Organized shelving keeps supplies within arm’s reach and encourages tidiness; balance visual weight by spreading books across levels and using matching containers to minimize clutter.
- Coordinate your desk with shelf styling and finish choices with existing décor—natural wood desks pair well with earth tones, while white or gray desks suit minimalist aesthetics with black accents.
Why Choose a Desk with Built-In Shelving
A desk with built-in shelving solves a fundamental problem: limited square footage. Instead of buying a desk, then a bookcase, then wall-mounted storage, one integrated piece handles multiple functions. You get workspace, book storage, display area, and document organization all in one unit.
Beyond floor space, shelving keeps supplies within reach. Pens, notepads, reference materials, and frequently used items sit at eye level or arm’s reach, reducing the time spent hunting through drawers. This proximity also encourages a tidier workspace, you’re more likely to put something back when it has a designated home just above your desk.
Finally, an office desk with shelves can define a work zone without swallowing your room. A compact L-shaped unit with shelving above creates a complete workstation in a corner, making it easier to mentally “clock out” when you step away from the desk.
Types of Desk and Shelf Configurations
Floating Shelves Above the Desktop
Floating shelves positioned 12 to 18 inches above your desk surface are the most accessible option for renters or those hesitant about permanent installation. These shelves appear to hang without visible supports, creating a clean, modern look. They work best for lighter items, notebooks, decor, framed photos, rather than heavy filing boxes. Installation requires locating wall studs and using heavy-duty brackets rated for your expected load. A typical floating shelf rated for 25 pounds per foot can hold office supplies and books comfortably, but you’ll need to spread weight evenly.
Floating shelves also come in modular systems that connect without brackets showing, offering flexibility if you ever move or reconfigure. The trade-off is cost: quality floating shelves and installation hardware run higher than a traditional shelf unit mounted to a desktop.
Side-Mounted Shelving Units
Side-mounted shelving bolts directly to the desk frame, usually on one or both sides. This approach works well for larger desks and pairs nicely with an office desk with shelves design that keeps vertical storage compact. The shelves stay aligned with your workspace and won’t wobble if you lean against the desk.
Side-mounted units accept heavier loads because the weight transfers directly to the desk frame rather than relying on wall anchors. They’re ideal if you need to store textbooks, binders, or office equipment. The downside: the desk becomes less portable, and the shelves can narrow your usable desktop area if not planned carefully.
How to Choose the Right Desk with Shelf for Your Space
Start by measuring your available space, including ceiling height. Many floating shelf setups assume standard 8-foot ceilings: if yours are lower, you may need narrower shelves or a different configuration. Measure the wall width where the desk will sit and account for any corners, windows, or outlets.
Next, consider your storage needs. If you’re organizing paperwork and binders, you’ll need deeper shelves (10 to 12 inches). For display and lighter supplies, shallower shelves (6 to 8 inches) work fine and visually take up less space. Weight capacity matters too, anchor your shelving to wall studs (typically 16 inches on center) if storing heavy items, or use toggle bolts and expansion anchors for drywall, though these are less reliable for significant weight.
Material choice affects both function and aesthetics. Solid wood shelves offer durability and warmth but cost more and require sealing if exposed to moisture. Plywood or MDF (medium-density fiberboard) are budget-friendly and accept paint or stain, though MDF isn’t ideal near humidity. Metal shelving units are industrial, affordable, and easy to assemble, but they rust if not powder-coated and can feel cold visually.
For an office desk with shelves that matches existing décor, confirm finish options. A desk in natural oak looks awkward paired with black metal shelves unless that’s your intentional design choice. Visit showrooms or request samples before committing.
DIY Desk with Shelf Project Guide
If you’re building your own desk and shelves, start with a solid plan. Free or low-cost plans are available, sites like Ana-White offer beginner-friendly desk with drawer and shelving plans that include a sturdy base and open storage.
Materials and Tools
For a basic 48-inch desk with two floating shelves, you’ll need:
- 1×12 or 1×10 lumber (actually 11.25″ or 9.25″ wide: nominal sizing differs from actual dimensions)
- 2×4 framing lumber for the base
- 1/4-inch plywood for the desktop (if building from scratch)
- Heavy-duty floating shelf brackets rated for at least 25 pounds per foot
- Wood screws (2.5-inch and 1.25-inch), wood glue, and sandpaper (120 and 220 grit)
- Primer and finish paint or wood stain
Tools include a miter saw or circular saw, drill-driver, stud finder, level, and measuring tape. A miter saw produces cleaner crosscuts than a circular saw, but a circular saw works if you’re careful and use a guide.
Step-by-Step Build
-
Cut and assemble the desk base. Cut your 2×4 framing to length, using pocket-hole joinery or simple butt joints with wood screws. Ensure the base is square by measuring diagonals (they should be equal). A rectangular base roughly 24 inches deep and 48 inches wide provides comfortable workspace without overwhelming the room.
-
Attach the desktop. Secure your plywood or solid-wood top with pocket holes along the inside edges of the frame. This method hides fasteners for a cleaner look. Leave a 1-inch overhang on three sides for visual balance.
-
Locate studs and mark shelf locations. Use a stud finder to locate wall studs 16 inches on center. Mark your shelf height, typically 12 to 18 inches above the desktop, using a level and measuring tape. Drive a nail or awl lightly into the wall at stud locations to confirm before drilling full holes.
-
Install brackets and shelves. Drill pilot holes to prevent splitting, then drive lag bolts or wood screws directly into studs. Floating brackets should be spaced 16 to 24 inches apart. Rest your shelf on the brackets and secure with a fastener underneath if the bracket design allows, or use shims to level before securing.
-
Sand, prime, and finish. Sand all surfaces with 120-grit, then 220-grit sandpaper to remove splinters and imperfections. Apply primer, then two coats of paint or stain. Shelves and desktop should be dry before bearing weight, typically 24 hours for paint, 48 hours for stain and poly.
Safety and Permits
Woodworking requires basic PPE: safety glasses, dust mask (especially with MDF), and ear protection if using power tools. Securing heavy shelving into studs is structurally sound and typically doesn’t require a permit, but check your local building codes. If your shelves will bear extremely heavy loads (50+ pounds), a licensed professional assessment isn’t overkill.
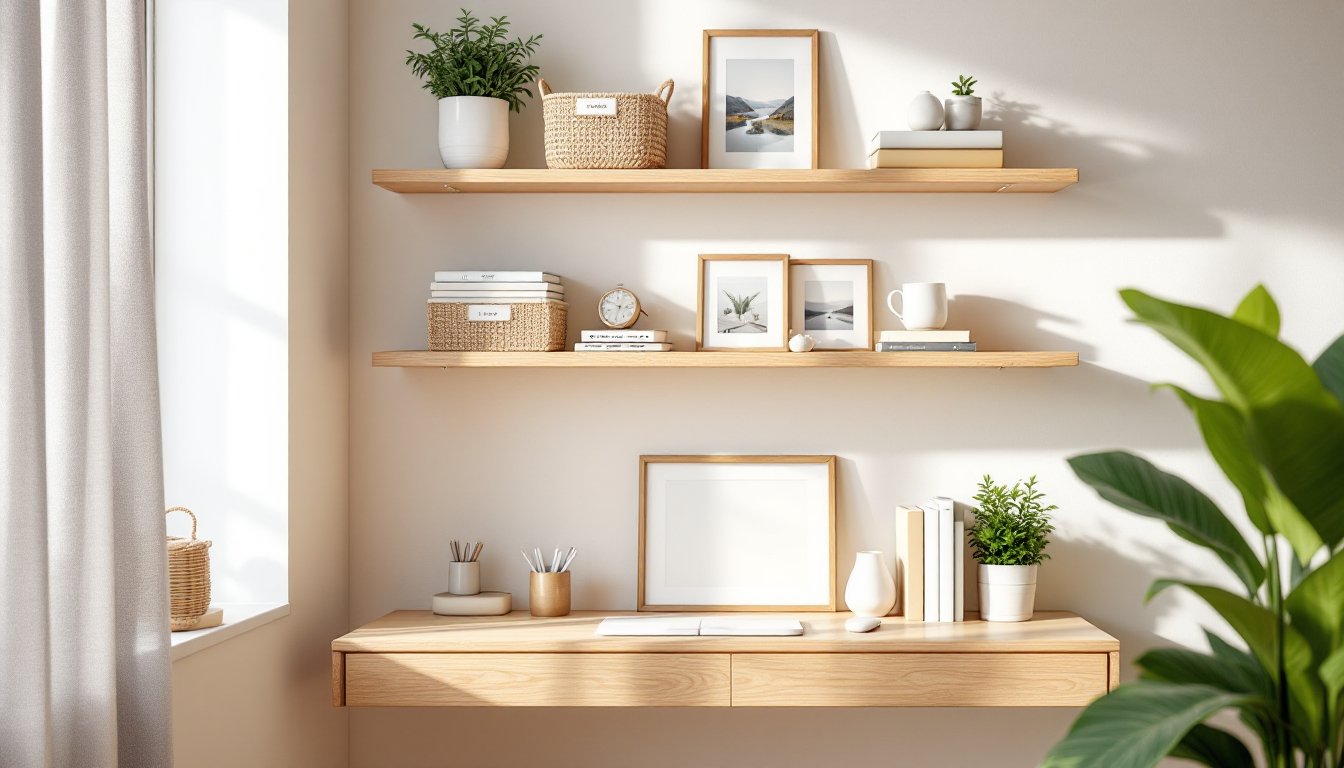
Styling and Organizing Your Desk Shelves
Once your desk with shelf is installed, organization prevents clutter. Group like items: keep writing supplies in one bin or cup, stack reference books together, and designate one shelf for decor versus storage.
Balance visual weight. Don’t stack all books on the top shelf: spread them across different levels. Mix vertical book stacks with horizontal displays and breathing room. A bare shelf doesn’t look unfinished, it looks intentional and less overwhelming.
Use matching containers (white bins, woven baskets, or labeled boxes) to corral small supplies. This approach hides visual clutter while keeping things accessible. Baskets also add warmth and texture compared to plastic bins.
Incorporate personal touches: a small framed photo, a plant, or a decorative bookend humanizes the space without adding storage demands. But, resist the temptation to overcrowd shelves, each item should earn its place.
For a workspace that doubles as a room focal point, coordinate shelf styling with your desk finish. A natural wood desk pairs well with earth-toned accessories and green plants, while a white or gray desk suits minimalist styling with black accents. When planning an office desk with shelves, consider how the entire unit will read visually in your room, not just its function.